
Not too long ago, my work required me to quickly prototype an online utility that enables customers to question giant language fashions (LLMs) throughout three major use instances: primary question-and-answer, question-and-answer over paperwork, and doc summarization. This work, dubbed the “Mayflower Venture,” culminated in a number of important classes discovered that we now have printed in our paper A Retrospective in Engineering Massive Language Fashions for Nationwide Safety. On this submit, I share my expertise constructing the totally different options of Mayflower’s net utility and supply step-by-step code in order that we will obtain comparable outcomes.
Decreasing the Barrier to Entry for Implementing LLMs
Our work on the SEI usually entails investigating cutting-edge applied sciences, researching their practicalities, and testing their efficiency. LLMs have turn out to be a mainstay within the synthetic intelligence (AI) and machine studying (ML) communities. LLMs will proceed to have an effect in bigger societal areas, reminiscent of academia, trade and protection. Since they look like right here for the foreseeable future, we within the SEI AI Division are researching their makes use of and limitations.
One space of analysis in assist of this mission is investigating how each customers and builders can interface with LLMs and the way LLMs may be utilized to totally different use instances. And not using a entrance finish or person interface, LLMs are unable to offer worth to customers. A part of my work on the AI Division’s Mayflower Venture was to construct an online utility to function this interface. This interface has allowed us to check a number of LLMs throughout three major use instances—primary query and reply, query and reply over paperwork, and doc summarization.
The barrier to entry for creating LLM-based purposes seems to be excessive for builders who would not have a lot expertise with LLM applied sciences or with ML. By leveraging our work through the steps I define on this submit, any intermediate Python developer can decrease that barrier to entry and create purposes that leverage LLM applied sciences. Please observe that the applying we construct on this submit is only for private testing and will not be deployed to manufacturing as is.
The LLM Software Stack: Gradio and Hugging Face Transformers
The LLM utility stack relies on two major instruments: Gradio and the Hugging Face Transformers library.
The Gradio Python library serves because the spine for the complete utility stack we’ll construct on this submit. Various options make this library effectively suited to quickly prototyping small net purposes. Gradio permits us to outline interactive entrance ends with hooks into Python back-end features with ease. All of the coding is finished in Python, so we don’t have to be skilled with conventional front-end net improvement practices to make use of it successfully. The interfaces we will make are even comparatively enticing, though we will cross in our personal CSS and JavaScript recordsdata to override default kinds and behaviors.
Utilizing Gradio as our back and front finish permits us to simply combine Python-based machine studying utilizing the Hugging Face Transformers library. This Transformers library offers APIs and instruments to simply obtain and practice state-of-the-art pretrained fashions. With just some traces of code, we will obtain, load, and question any pre-trained LLM that our native assets can assist. Gradio enhances Transformers by permitting us to shortly construct an online utility that allows customers to ship queries to our LLM and subsequently obtain a response.
The mixture of Gradio and Hugging Face Transformers varieties a fast and versatile utility stack that allows the event of superior LLM purposes. Gradio provides a seamless and intuitive interface, eliminating the necessity for in depth front-end improvement data whereas guaranteeing clean integration with Python-based machine studying by way of Hugging Face Transformers.
Getting ready a Improvement Setting for our LLM Software
To construct and run this LLM server and its dependencies, we should set up Python 3.8 or increased. Within the screenshots and code on this submit, we shall be utilizing Python model 3.10. We can even execute this code in a Linux setting, nevertheless it also needs to work within the Home windows setting. Likewise, we have to set up the corresponding model of pip, which permits us to shortly set up the Python libraries used right here.
There are various methods to execute Python code in an remoted setting. One of the widespread methods to do that is thru the usage of digital environments. On this submit, we’ll be utilizing the Python venv module, since it’s fast, widespread, and simple to make use of. This module helps creating light-weight digital environments, so we will use it to neatly comprise this code by itself.
To start out, open up a privileged terminal. If we don’t have already got venv put in, we will set up it simply with pip:
pip3 set up -y virtualenvWith venv put in, we will now set up a digital setting for this venture. We’re going to call this setting “gradio_server”.
python3 -m venv gradio_serverIf we peruse the listing we’re working in, we’ll discover that there’s a new listing that has been given the title we specified within the earlier command. The very last thing we do earlier than we begin constructing this venture out is activate the digital setting. To take action, we simply have to run the setting activation script:
supply gradio_server/bin/activate
(venv) $
Operating the activation script will doubtless trigger our terminal immediate to vary in some visible means, such because the second line proven above. If so, we’ve activated our digital setting, and we’re prepared to maneuver on to the subsequent steps. Understand that if we exit this terminal session, we might want to reactivate the digital setting utilizing the identical command.
Putting in Gradio and Getting a Entrance Finish Operating
With our digital setting established, we will start putting in the Gradio Python library and establishing a primary net utility. Utilizing pip, putting in Gradio consists of 1 command:
pip3 set up gradioAs simple as putting in Gradio was, utilizing it to shortly arrange an online server is equally simple. Placing the code beneath right into a Python file and operating it should produce a really primary net server, with a single place to just accept person enter. If we run this code, we must always have the ability to go to “localhost:7860” in our browser to see the outcomes.
import gradio as gr

with gr.Blocks() as server:
  gr.Textbox(label="Enter", worth="Default worth...")

server.launch()
Outcome:
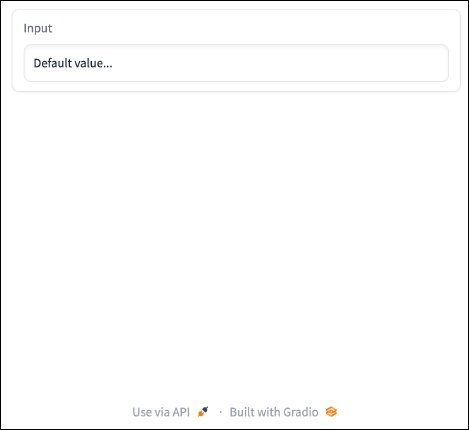
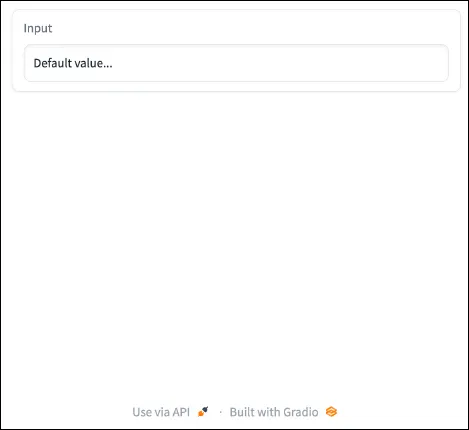
Wonderful. We have now a quite simple net server up and operating, however customers can not work together with the one enter we’ve positioned there but. Let’s repair that, and spruce up the applying a bit too.
import gradio as gr

with gr.Blocks() as server:
  with gr.Tab("LLM Inferencing"):
    model_input = gr.Textbox(label="Your Query:", worth="What’s your query?", interactive=True)
    model_output = gr.Textbox(label="The Reply:", interactive=False, worth="Reply goes right here...")

server.launch()
Outcome:
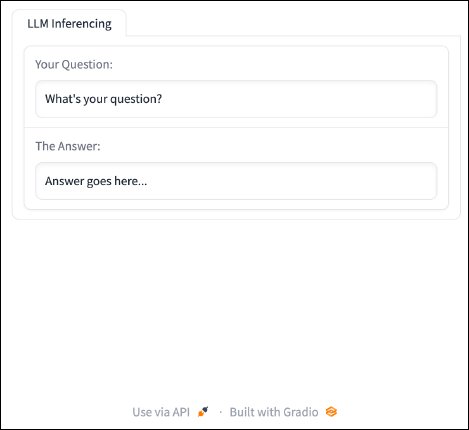
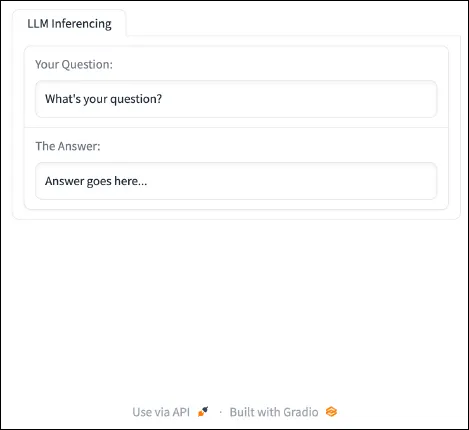
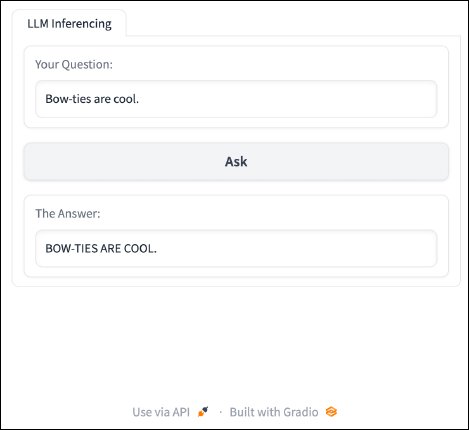
The brand new additions embrace a labeled tab to help with group, a spot for our utility to show output, and labels to our inputs. We have now additionally made the person enter interactive. Now, we will make these inputs and outputs helpful. The enter textbox is able to settle for person enter, and the output textbox is able to present some outcomes. Subsequent, we add a button to submit enter and a operate that can do one thing with that enter utilizing the code beneath:
import gradio as gr

def ask(textual content):
  return textual content.higher()

with gr.Blocks() as server:
  with gr.Tab("LLM Inferencing"):
    model_input = gr.Textbox(label="Your Query:",
                             worth="What’s your query?", interactive=True)
    ask_button = gr.Button("Ask")
    model_output = gr.Textbox(label="The Reply:",
                              interactive=False, worth="Reply goes right here...")

  ask_button.click on(ask, inputs=[model_input], outputs=[model_output])

server.launch()
Outcome:
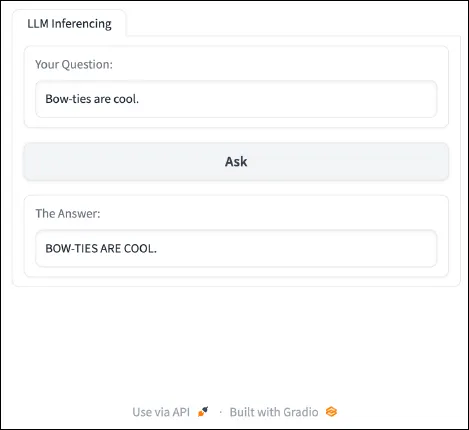
The above code outlined a operate that manipulates the textual content that’s inputted by the person to transform all characters to uppercase. As well as, the code added a button to the applying which permits customers to activate the operate.
By themselves, the button and the operate do nothing. The important piece that ties them collectively is the event-listener towards the tip of the code. Let’s break this line down and look at what’s taking place right here. This line takes the ask_button, which was outlined earlier within the code, and provides an event-listener through the .click on methodology. We then cross in three parameters. The primary parameter is the operate that we need to execute as the results of this button being clicked. On this case, we specified the ask operate that we outlined earlier. The second parameter identifies what must be used as enter to the operate. On this case, we wish the textual content that the person inputs. To seize this, we have to specify the model_input object that we outlined earlier within the code. With the primary two parameters, clicking the button will consequence within the ask methodology being executed with the model_input textual content as enter. The third parameter specifies the place we wish return values from the ask operate to go. On this case, we wish the output to be returned to the person visibly, so we will merely specify the output textbox to obtain the modified textual content.
And there we now have it. With just some traces of Python code, we now have an online utility that may take person enter, modify it, after which show the output to the person. With this interface arrange and these fundamentals mastered, we will incorporate LLMs into the combination.
Including ChatGPT
Okay, let’s make this net utility do one thing attention-grabbing. The primary characteristic we’re going so as to add is the power to question a LLM. On this case, the LLM we’re going to combine is ChatGPT (gpt-3.5-turbo). Due to the Python library that OpenAI has printed, doing that is comparatively easy.
Step one, as traditional, is to put in the OpenAI Python library:
pip3 set up openaiWith the dependency put in, we’ll want so as to add it to the imports in our utility code:
import gradio as gr
import openai
Notice that ChatGPT is an exterior service, which suggests we gained’t have the ability to obtain the mannequin and retailer it domestically. As a substitute, we should entry it through OpenAI’s API. To do that, we want each an OpenAI account and an API key. The excellent news is that we will make an OpenAI account simply, and OpenAI permits us a sure variety of free queries. After we’ve signed up, comply with OpenAI’s directions to generate an API Key. After producing an API key, we might want to give our Python code entry to it. We usually ought to do that utilizing setting variables. Nevertheless, we will retailer our API Key instantly within the code as a variable, since this utility is only for testing and can by no means be deployed to manufacturing. We are able to outline this variable instantly beneath our library imports.
# Paste your API Key between the citation marks.
openai.api_key = ""
With the library put in and imported and API key specified, we will lastly question ChatGPT in our program. We don’t want to vary an excessive amount of of our utility code to facilitate this interplay. In reality, all we now have to do is change the logic and return worth of the ask methodology we outlined earlier. The next snippet of code will change our “ask” operate to question ChatGPT.
def ask(textual content):

  completion = openai.ChatCompletion.create(
    mannequin="gpt-3.5-turbo",
    messages=[
      {‘role’: ‘user’, ‘content’: text}
    ],
    temperature=0
  )
  return completion.selections[0].message.content material
Let’s break down what’s taking place within the methodology. Solely two actual actions are occurring. The primary is looking the openai.ChatCompletion.create(), which creates a completion for the offered immediate and parameters. In different phrases, this operate accepts the person’s enter query and returns ChatGPT’s response (i.e. its completion). Along with sending the person’s query, we’re additionally specifying the mannequin we need to question, which is gpt-3.5-turbo on this case. There are a number of fashions we will select from, however we’re going to make use of OpenAI’s GPT-3.5 mannequin. The opposite attention-grabbing factor we’re specifying is the mannequin’s temperature, which influences the randomness of the mannequin’s output. The next temperature will end in extra numerous, artistic, outputs. Right here we arbitrarily set the temperature to zero.
That’s it. Beneath we will see the code as an entire:
import gradio as gr
import openai
import os

# Paste your API Key between the citation marks.
openai.api_key = ""

def ask(textual content):

  completion = openai.ChatCompletion.create(
    mannequin="gpt-3.5-turbo",
    messages=[
      {‘role’: ‘user’, ‘content’: text}
    ],
    temperature=0
  )
  return completion.selections[0].message.content material

with gr.Blocks() as server:
  with gr.Tab("LLM Inferencing"):

    model_input = gr.Textbox(label="Your Query:",
                             worth="What’s your query?", interactive=True)
    ask_button = gr.Button("Ask")
    model_output = gr.Textbox(label="The Reply:", interactive=False,
                              worth="Reply goes right here...")

  ask_button.click on(ask, inputs=[model_input], outputs=[model_output])

server.launch()
By operating the above code, we must always have an online utility that is ready to instantly question ChatGPT.
Swapping ChatGPT for RedPajama
The present net server is principally simply ChatGPT with further steps. This operate calls ChatGPT’s API and asks it to finish a question. Leveraging different organizations’ pretrained fashions may be helpful in sure conditions, but when we need to customise points of mannequin interplay or use a customized fine-tuned mannequin, we have to transcend API queries. That’s the place the Transformers library and the RedPajama fashions come into play.
Fashions like gpt-3.5-turbo have anyplace from 100 billion to greater than a trillion parameters. Fashions of that dimension require enterprise-level infrastructure and are very costly to implement. The excellent news is that there have been waves of a lot smaller LLMs from quite a lot of organizations which have been printed in the previous few years. Most consumer-grade {hardware} can assist fashions with 3 billion and even 7 billion parameters, and fashions on this vary can nonetheless carry out fairly effectively at many duties, reminiscent of question-and-answer chatbots. For that reason, we’ll be utilizing the RedPajama INCITE Chat 3B v1 LLM. This mannequin performs reasonably effectively whereas nonetheless being sufficiently small to run on fashionable GPUs and CPUs.
Let’s dive again into our code and get RedPajama-INCITE-Chat-3B-v1 operating in our net utility. We’ll use the Hugging Face Transformers library, which makes this course of surprisingly simple. Simply as earlier than, we’ll change the code in our ask operate to leverage the RedPajama-INCITE-Chat-3B-v1 mannequin as an alternative of ChatGPT. Earlier than we will do this, we might want to set up two Python libraries: PyTorch and Hugging Face Transformers.
pip3 set up -y torch transformersWith these put in, we will implement the brand new logic in our “ask” operate:
import torch
from transformers import AutoTokenizer, AutoModelForCausalLM

def ask(textual content):
  tokenizer = AutoTokenizer.from_pretrained("togethercomputer/RedPajama-INCITE-Chat-3B-v1")
  mannequin = AutoModelForCausalLM.from_pretrained("togethercomputer/RedPajama-INCITE-Chat-3B-v1", torch_dtype=torch.bfloat16)

  inputs = tokenizer(textual content, return_tensors=‘pt’).to(mannequin.machine)

  input_length = inputs.input_ids.form[1]
  outputs = mannequin.generate(**inputs, max_new_tokens=100, temperature=0.7,
                           return_dict_in_generate=True)

  tokens = outputs.sequences[0, input_length:]
  return tokenizer.decode(tokens)
The very first thing to notice in regards to the new code is that we’ve imported PyTorch in addition to AutoTokenizer and AutoModelForCausalLLM from Transformers. The latter two features are how we’ll load the RedPajama mannequin and its related tokenizer, which happen on the primary and second traces of the brand new ask operate. By leveraging the Transformers library, each the tokenizer and the mannequin shall be instantly downloaded from Hugging Face and loaded into Python. These two traces of code are all that we have to seize the RedPajama-INCITE-Chat-3B-v1 and begin interacting with it. The next line focuses on parsing the person’s inputted textual content right into a format may be fed into the mannequin.
The subsequent two traces are the place the magic occurs. Particularly, mannequin.generate() is how we feed the immediate into the mannequin. On this instance, we’re setting max_new_tokens to be 100, which limits the size of textual content the mannequin can produce as output. Whereas rising this dimension does enable the mannequin to provide longer outputs, every token produced will increase the time wanted to get a consequence. We’re additionally specifying the temperature of this mannequin’s response to be 0.7. As talked about earlier, the next temperature ends in extra random and artistic outputs by giving the mannequin extra leeway when choosing which token to decide on subsequent. Set the temperature low (nearer to 0.0) if we wish consistency in our mannequin responses. Lastly, the final two traces are there to extract the brand new tokens (i.e., the LLM’s response to the person enter) after which return it to the person interface.
There are two extra notes about this new code. First, because it at the moment stands, this implementation will run solely utilizing CPUs. When you have an Apple M1 or later processor with GPU cores and unified reminiscence, you may comply with directions right here to make sure you are using that {hardware}. When you have a GPU and are acquainted with utilizing CUDA with PyTorch, you may make the most of your GPU by including the next line of code to our ask operate:
def ask(textual content):
	...
	mannequin = AutoModelForCausalLM.from_pretrained("togethercomputer/RedPajama-INCITE-Chat-3B-v1", torch_dtype=torch.bfloat16)
	# ADD THIS
	mannequin = mannequin.to(‘cuda:0’)
Second, after we flip the server on and submit we first question, the mannequin and tokenize shall be mechanically downloaded. Relying on our Web connection, it might take a while to finish. It would look one thing like this:
Downloading (…)okenizer_config.json: 100%|████████████████████████████████████████████| 237/237 [00:00<00:00, 132kB/s]
Downloading (…)/primary/tokenizer.json: 100%|███████████████████████████████████████| 2.11M/2.11M [00:00<00:00, 2.44MB/s]
Downloading (…)cial_tokens_map.json: 100%|██████████████████████████████████████████| 99.0/99.0 [00:00<00:00, 542kB/s]
Downloading (…)lve/primary/config.json: 100%|███████████████████████████████████████████| 630/630 [00:00<00:00, 3.34MB/s]
Downloading pytorch_model.bin: 100%|█████████████████████████████████████████████| 5.69G/5.69G [22:51<00:00, 4.15MB/s]
Downloading (…)neration_config.json: 100%|████████████████████████████████████████████| 111/111 [00:00<00:00, 587kB/s]
When the obtain is full, the code will subsequent give the enter immediate to the newly downloaded mannequin, which can course of the immediate and return a response. After downloading as soon as, the mannequin will have the ability to reply to queries sooner or later with no need to be re-downloaded.
Final, after implementing the brand new code and turning the server again on, we will ask the RedPajama-INCITE-Chat-3B-v1 mannequin questions. It would appear to be this:
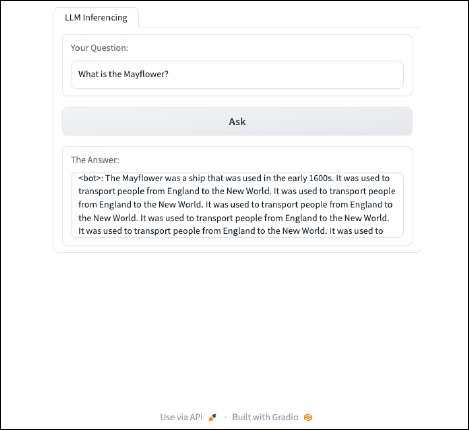

Implementing Immediate Engineering
We bought output. That’s nice. Nevertheless, the output may very well be improved by implementing immediate engineering to enhance the responses from the RedPajama-INCITE-Chat-3B-v1 mannequin. At their core, LLMs are next-word predictors. They obtain an enter, a immediate, after which predict what phrase (token) will come subsequent primarily based on the info they had been skilled on. The mannequin repeats the method of predicting subsequent phrases till it reaches a stopping level. With none fine-tuning, smaller parameter fashions reminiscent of this one are usually solely good at ending sentences.
The RedPajama-INCITE-Chat-3B-v1 mannequin is definitely a fine-tuned model of the RedPajama-INCITE-Base-3B-v1. The unique mannequin was skilled on a dataset of information and grammar to develop its capacity to provide high quality textual content responses. That mannequin then obtained extra coaching that particularly improves its capacity to carry out a selected job. As a result of this chat mannequin was advantageous -tuned particularly as a question-and-answer chat bot, one of the best outcomes from this mannequin will come from prompts that mirror the dataset used for fine-tuning. RedPajama offers an instance of how prompts must be engineered for this function:
immediate = "<human>: Who's Alan Turing?n<bot>:"What we will study from the offered instance is that as an alternative of passing the mannequin our question instantly, we must always format it just like the above immediate format. Implementing that within the ask operate may be accomplished with only one line of code.
def ask(textual content):
	...
	# ADD THIS
	immediate = f’<human>: {textual content}n<bot>:’
	inputs = tokenizer(immediate, return_tensors=‘pt’).to(mannequin.machine)
	...
That line takes the person enter and inserts it right into a immediate that works effectively with this mannequin. The very last thing to do is take a look at to see how the immediate has affected the mannequin’s responses. Operating the identical question as earlier than, our enter ought to appear to be this:
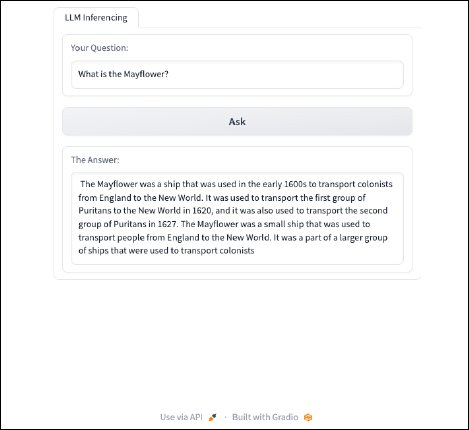
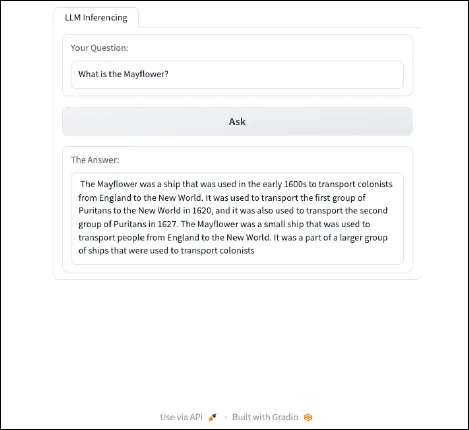
Whereas not excellent, immediate engineering helped to offer a extra helpful response from the mannequin. Beneath is the ultimate, full program code.
import gradio as gr
import openai
import os

import torch
from transformers import AutoTokenizer, AutoModelForCausalLM

def ask(textual content):

  tokenizer = AutoTokenizer.from_pretrained("togethercomputer/RedPajama-INCITE-Chat-3B-v1")
  mannequin = AutoModelForCausalLM.from_pretrained
    ("togethercomputer/RedPajama-INCITE-Chat-3B-v1",
     torch_dtype=torch.bfloat16)

  immediate = f’<human>: {textual content}n<bot>:’
  inputs = tokenizer(immediate, return_tensors=‘pt’).to(mannequin.machine)

  input_length = inputs.input_ids.form[1]
  outputs = mannequin.generate(**inputs, max_new_tokens=48, temperature=0.7,
                           return_dict_in_generate=True)

  tokens = outputs.sequences[0, input_length:]
  return tokenizer.decode(tokens)

with gr.Blocks() as server:
  with gr.Tab("LLM Inferencing"):

    model_input = gr.Textbox(label="Your Query:",
                             worth="What’s your query?", interactive=True)
    ask_button = gr.Button("Ask")
    model_output = gr.Textbox(label="The Reply:", interactive=False,
                              worth="Reply goes right here...")

  ask_button.click on(ask, inputs=[model_input], outputs=[model_output])

server.launch()
Subsequent Steps: Superior Options
With the assistance of Gradio and the Hugging Face Transformers library, we had been in a position to shortly piece collectively the prototype proven on this weblog submit. Now that we now have expertise working with Gradio and Transformers, we will broaden this net utility to carry out all types of duties, reminiscent of offering an interactive chatbot or performing doc summarization. In future weblog posts, I’ll navigate the method of implementing a few of these extra superior options.